
Cleaning
- After Each Camping Trip: As soon as possible after returning from a trip, clean the tent to remove dirt, stains, and food particles. This prevents mildew and mold growth.
- Seasonally (Every 3-6 months): If the tent isn’t used frequently, give it a thorough clean and check for any damage or wear.
Waterproofing
- Before the First Use of the Season: Apply or reapply waterproofing treatments before using the tent for the first time each camping season to ensure it’s ready for wet weather.
- As Needed: Reapply waterproofing products if you notice leaks or if the tent’s water resistance has diminished. This might be once or twice a season depending on usage and weather conditions.
Maintenance
- Monthly Inspections: Check your tent for any signs of wear or damage. Address any issues immediately to prevent them from worsening.
- Before and After Long-Term Storage: Inspect and clean the tent before storing it for long periods, such as over winter. Ensure it’s dry and treated with waterproofing if necessary.
- After Each Use: Make sure the tent is completely dry before packing it away to avoid mildew growth.
By following these timelines, you’ll help maintain your tent’s condition and extend its lifespan.
Repairing Minor Damages
1. Fixing Small Tears
Materials Needed:
- Tent repair tape or patch kit (available at outdoor gear stores)
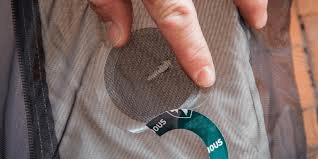
- We love NoSo Patches
- Duct tape works in a pinch!
- Scissors
- Clean cloth
- (Optional) Seam sealer
Steps:
- Clean the Area: Before applying any repair material, make sure the area around the tear is clean and dry. Wipe it with a clean cloth to remove any dirt or debris.
- Trim the Tear: If the tear has jagged edges, trim them slightly to create a smoother surface.
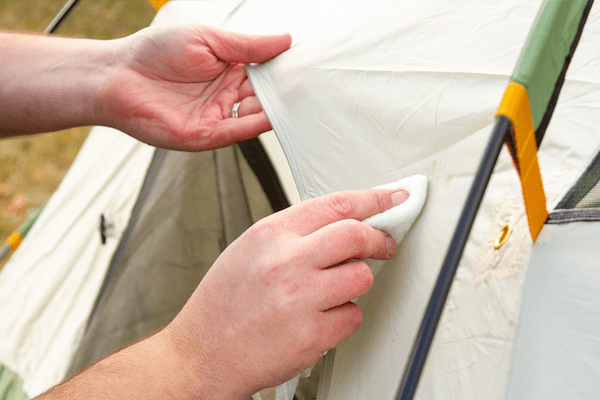
- Apply Repair Tape or Patch:
- Repair Tape: Cut a piece of tent repair tape slightly larger than the tear. Stick it over the tear, pressing firmly to ensure it adheres well.
- Patch Kit: If using a patch kit, apply the adhesive to the back of the patch and place it over the tear. Press down firmly to secure it.
- Seal the Edges (Optional): For added durability, you can apply seam sealer around the edges of the patch to ensure a watertight seal.
- Allow to Cure: Let the repair set for at least 24 hours before using the tent to ensure the adhesive fully bonds.
Repairing mesh windows on a tent can be done effectively with a few simple steps. Here’s how:
Materials Needed:
- Tent mesh repair kit (often includes patches or adhesive)
- Scissors
- Needle and thread (if sewing is required)
- Rubbing alcohol or soap and water (for cleaning)
- A small piece of fabric or mesh (optional, for larger repairs)
2. Steps to Repair Tent Mesh Windows:
- Assess the Damage: Examine the mesh window to determine the extent of the damage. Small tears or holes can typically be repaired with a patch, while larger damage may require additional fabric.
- Clean the Area: Clean the area around the tear with rubbing alcohol or a mild soap and water solution to remove any dirt and oils. Ensure the mesh is completely dry before proceeding.
- Apply a Mesh Patch:
- For Small Tears: Use a pre-cut mesh patch from your repair kit. Position the patch over the tear, ensuring it covers the damaged area completely. If the patch has an adhesive backing, press it firmly onto the mesh.
- For Larger Holes: If the damage is extensive, you might need to use a larger piece of mesh or fabric. Cut a patch slightly larger than the hole. Apply adhesive if necessary, then place the patch over the damaged area. Secure it with needle and thread if the repair kit does not include an adhesive patch.
- Seal the Edges: If the repair patch does not have adhesive or if you are using fabric, sew around the edges of the patch with a needle and thread to ensure it stays in place. Use a tight, small stitch to prevent further damage.
- Allow to Set: Let the repair set according to the instructions on the repair kit or adhesive. Usually, this involves letting it cure for several hours or overnight.
- Check the Repair: After the repair has set, inspect the mesh window to ensure the patch is secure and there are no gaps. Test the mesh by gently stretching it to make sure the patch holds.
2. Fixing Zipper Issues
Materials Needed:
- Zipper lubricant (optional)
- Needle and thread (for more serious repairs)
- Replacement zipper sliders (if needed)
Steps:
- Check for Obstructions: If the zipper is stuck, check for any obstructions like dirt or fabric caught in the teeth. Gently remove any obstructions.
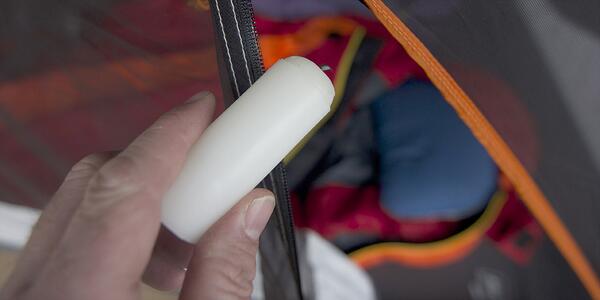
- Lubricate the Zipper: Apply a small amount of zipper lubricant to the teeth to help smooth out the movement. Make sure to use a lubricant that’s safe for outdoor gear. If you’re looking for an inexpensive option, candles work well! Just rub along the zipper.
- Align the Teeth: If the zipper is misaligned, gently pull the slider back and forth while aligning the teeth with your fingers.
- Repair the Slider: If the zipper slider is damaged or has come off, you may need to replace it:
- Replace the Slider: Remove the damaged slider by cutting or pulling it off the zipper track. Slide the new slider onto the track and test it to ensure it works smoothly.
- Sew Loose Zipper Teeth: For serious issues like broken teeth, you may need to sew or stitch the affected area. Use a needle and strong thread to sew the zipper teeth back into place.
Help, My Tent Started to Leak!
Here are three effective methods to waterproof your tent:
- Seal the Seams: Apply seam sealer to prevent moisture from leaking through the seams.
- Renew the Urethane Coating: Reapply urethane coating on the inside of your rainfly and the tent floor to reinforce their moisture barriers.
- Update the DWR Coating: Refresh the durable water repellent (DWR) coating on your rainfly to help it repel water more effectively.
Seam Sealing Instructions
- Set Up the Tent: Place your tent in a dry, sunny spot or a brightly lit room to make it easier to inspect all the seams. For better access, set the fly up inside out.
- Inspect and Prepare: Check the underside of the fly and the inner side of the tent body for any seam tape that’s coming loose. Gently remove any peeling sections, but leave the intact sections as they are.
- Clean the Seams: Use a rag and rubbing alcohol to gently clean the seams. This helps the seam sealer adhere better.
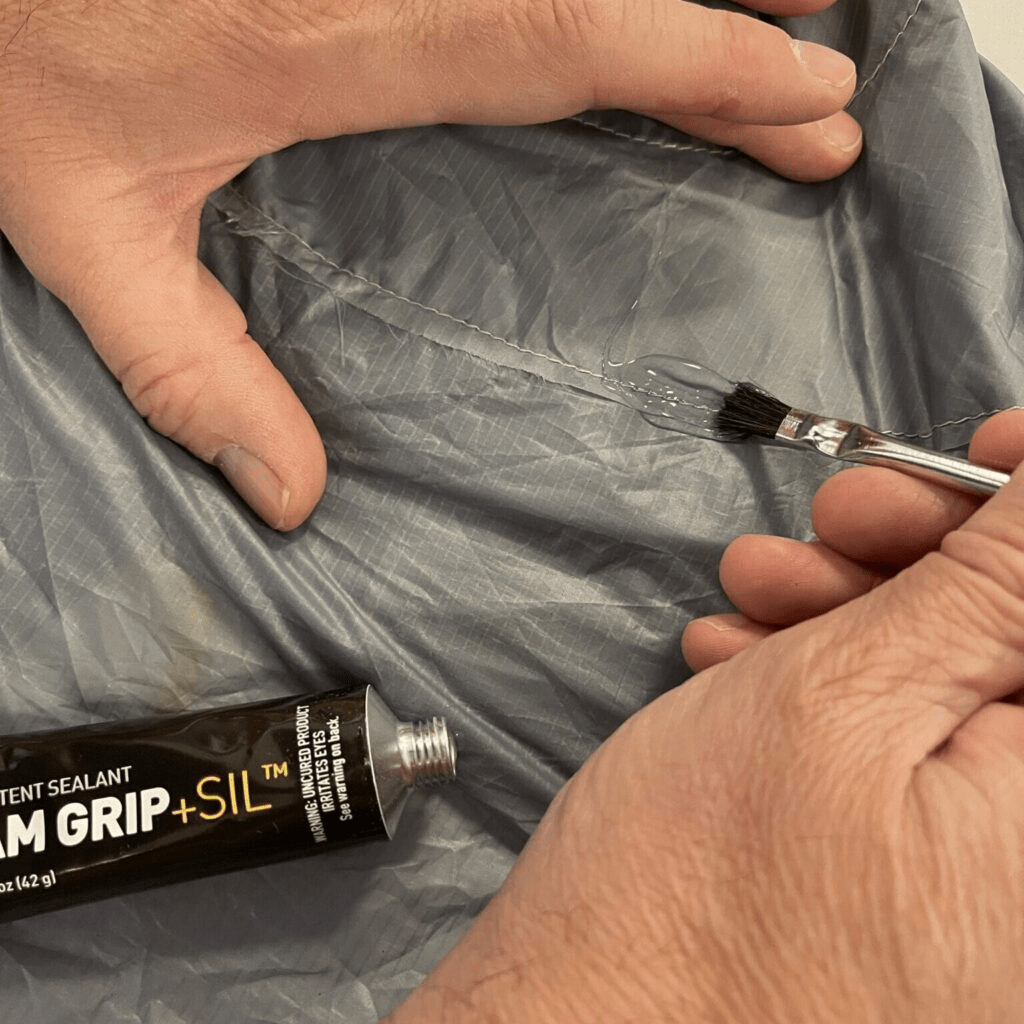
- Apply Seam Sealer: Apply the new seam sealer to all the seams, ensuring full coverage. If you find that one seam is starting to fail, consider sealing all the seams as a precaution.
- Allow to Dry: Let the seam sealer dry completely before using the tent. This ensures a proper seal and prevents leaks.
Reapplying Urethane Coating to Your Tent
If you see flaking on the inside of your rainfly or on the tent floor, it’s time to reapply a new urethane coating.
Here’s what you’ll need:
- A sponge with an abrasive side
- Rubbing alcohol
- Tent sealant: Make sure to choose the correct type for your tent. Silicone-treated fabrics require a different sealer than polyurethane-coated fabrics. Most tents use polyurethane-coated fabrics, but if you’re unsure, check with the manufacturer for guidance.
Here’s how to apply the tent sealant:
- Prepare the Surface: Lay your rainfly and/or tent floor flat. Use a sponge and rubbing alcohol to gently scrub off any flaking coating.
- Apply Sealant: Apply a thin, even layer of the new tent sealant over the entire surface, following the instructions on the sealant bottle.
- Drying Time: Allow the new coating to dry for at least 24 hours before packing your tent.
- Clean Up: Wash your hands thoroughly to remove any residue from the sealant and coated tent fabrics.
Refreshing the DWR
If rain is no longer beading up on your rainfly, it’s time to refresh the durable water repellent (DWR) coating. Here’s what you’ll need:
- A spray-on water-repellent product
- A clean, damp cloth
- Water
Here’s how to apply the waterproof spray:
- Prepare the Tent: Set up the tent and spray the rainfly with clean water. If you’ve recently washed your tent, you can apply the new DWR coating without waiting for it to dry.
- Apply the Spray: Evenly apply the waterproof spray over the exterior of the rainfly.
- Remove Excess: After a few minutes, use your damp cloth to wipe off any excess coating.
- Dry Completely: Allow the tent to dry thoroughly before packing it away.
Preventative Tips:
- Regularly clean and lubricate the zipper to keep it functioning smoothly.
- Avoid forcing the zipper if it gets stuck; this can cause further damage.
How to Repair Tent Poles
Tent poles are essential for maintaining the structure and stability of your tent, so knowing how to repair them can save your camping trip. Here’s a step-by-step guide for repairing common issues with tent poles:
1. Assess the Damage:
- Cracks or Splits: Check for any visible cracks or splits along the length of the pole. These are often caused by excessive bending or impact.
- Broken Sections: Determine if any sections of the pole are completely broken or detached.
- Bent Poles: Look for any bends or warps that might compromise the pole’s integrity.
2. Gather Your Repair Kit:
- Pole Repair Sleeve: Most tent repair kits include a pole repair sleeve, which is a tube that fits over the damaged section.
- Pole Repair Tape: For temporary fixes, pole repair tape can be used to hold a cracked pole together.
- Replacement Poles: In severe cases, you might need to replace the broken section of the pole.
3. Repairing a Cracked or Split Pole:
- Use a Repair Sleeve: Slide the pole repair sleeve over the cracked or split area. The sleeve should extend beyond the damaged section to provide adequate support.
- Secure the Sleeve: If necessary, use tape or a small amount of adhesive to secure the sleeve in place.
4. Fixing a Broken Pole:
- Join the Sections: If the pole is broken into separate pieces, align them carefully. If you have a repair sleeve, slide it over the join to reinforce the connection.
- Use Tape for a Temporary Fix: Wrap pole repair tape around the joint to hold the sections together temporarily. This is a good short-term solution but should be replaced with a more permanent fix as soon as possible.
5. Straightening a Bent Pole:
- Gently Bend Back: Carefully and slowly bend the pole back into shape. Be cautious not to apply too much pressure, as this could cause further damage.
- Use a Repair Sleeve: For added support, slide a repair sleeve over the bent area to help maintain the pole’s straightness.
6. Testing and Reinforcing:
- Check the Repair: Once you’ve made the repair, test the pole by setting up your tent to ensure it holds properly.
- Reinforce if Needed: If the repair seems unstable, reinforce it with additional tape or a longer repair sleeve.
7. Consider Replacements:
- Replacement Poles: If the damage is extensive or the repair doesn’t hold, consider contacting the manufacturer for replacement poles or purchasing a new set if needed.
Regular maintenance and careful handling of your tent poles can help prevent damage and extend their lifespan. Always carry a basic repair kit on your camping trips to address any issues promptly.
Additional Maintenance Tips
- Carry a Repair Kit: When heading out on camping trips, carry a small repair kit with tape, a patch, and a needle and thread for quick fixes on the go.
- Regular Checks: Incorporate these repairs into your regular maintenance routine. Addressing minor issues promptly prevents them from becoming major problems.
By keeping on top of these minor repairs, you’ll ensure your tent remains reliable and comfortable for your camping adventures. Happy camping!
